| App Wallet | Remote Wallet | |||
| on same device | on different device | |||
| Issue Credentials | ||||
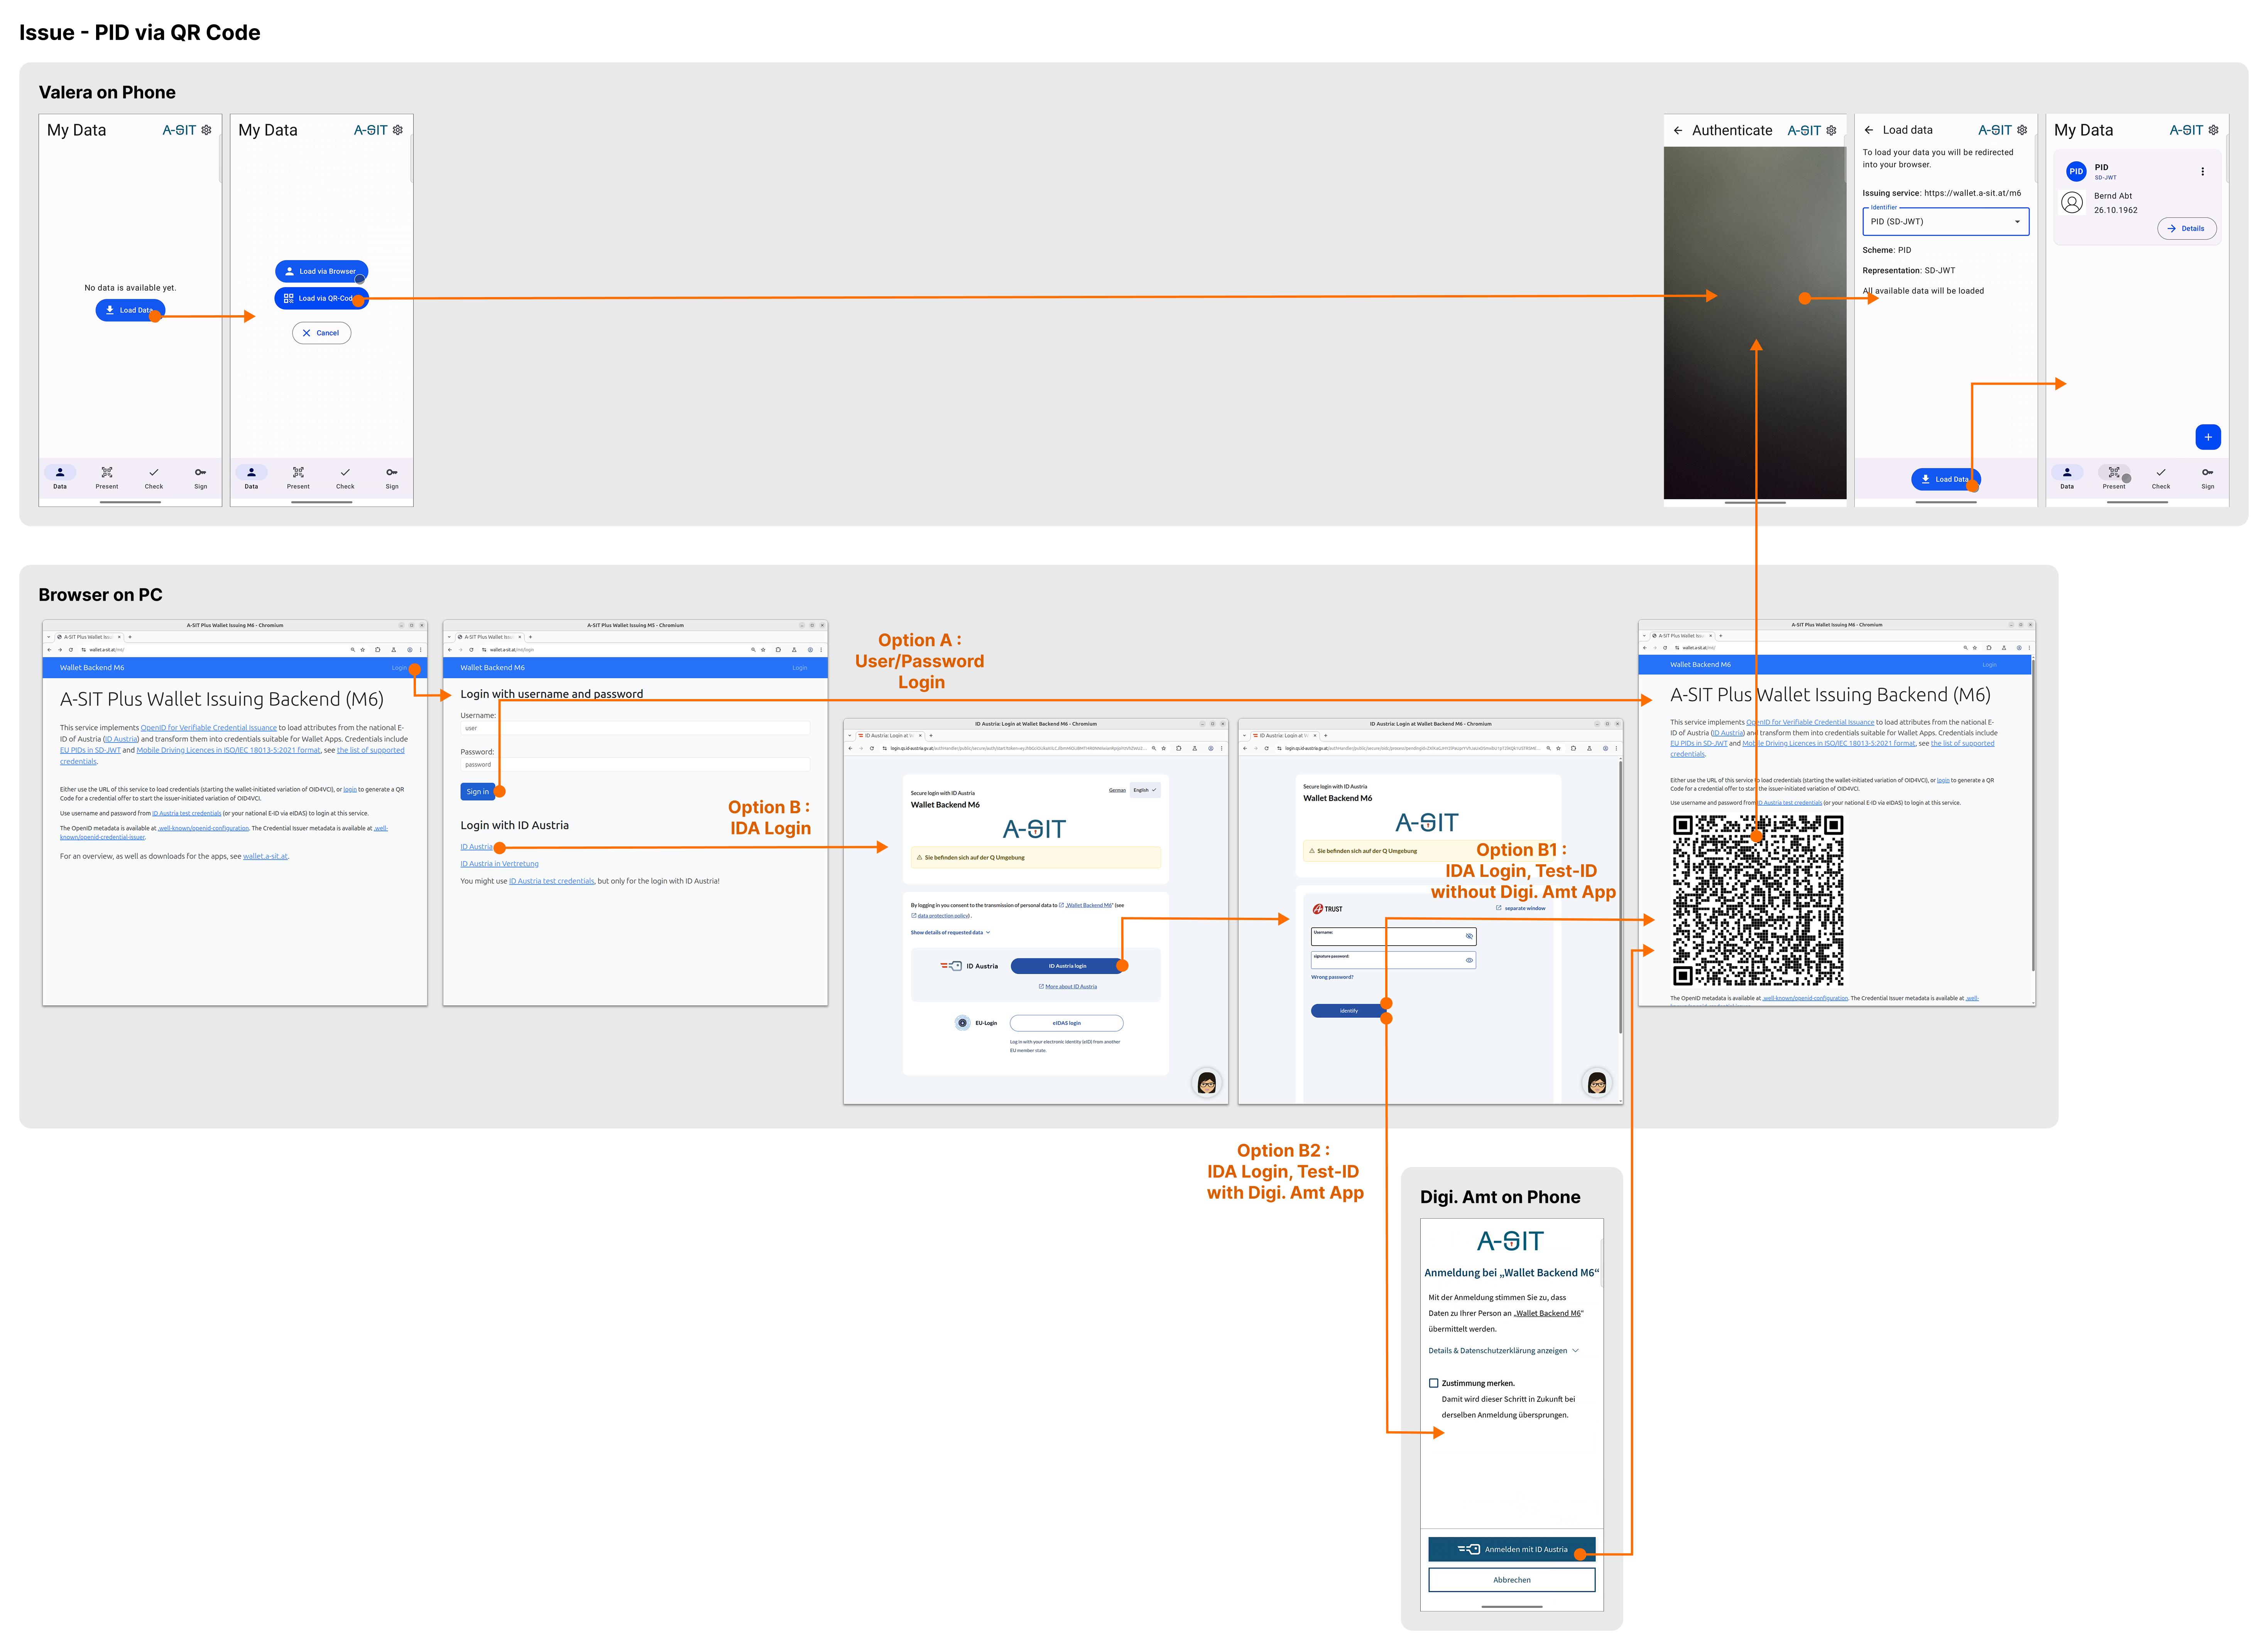
| » via QR | - | steps | - | |
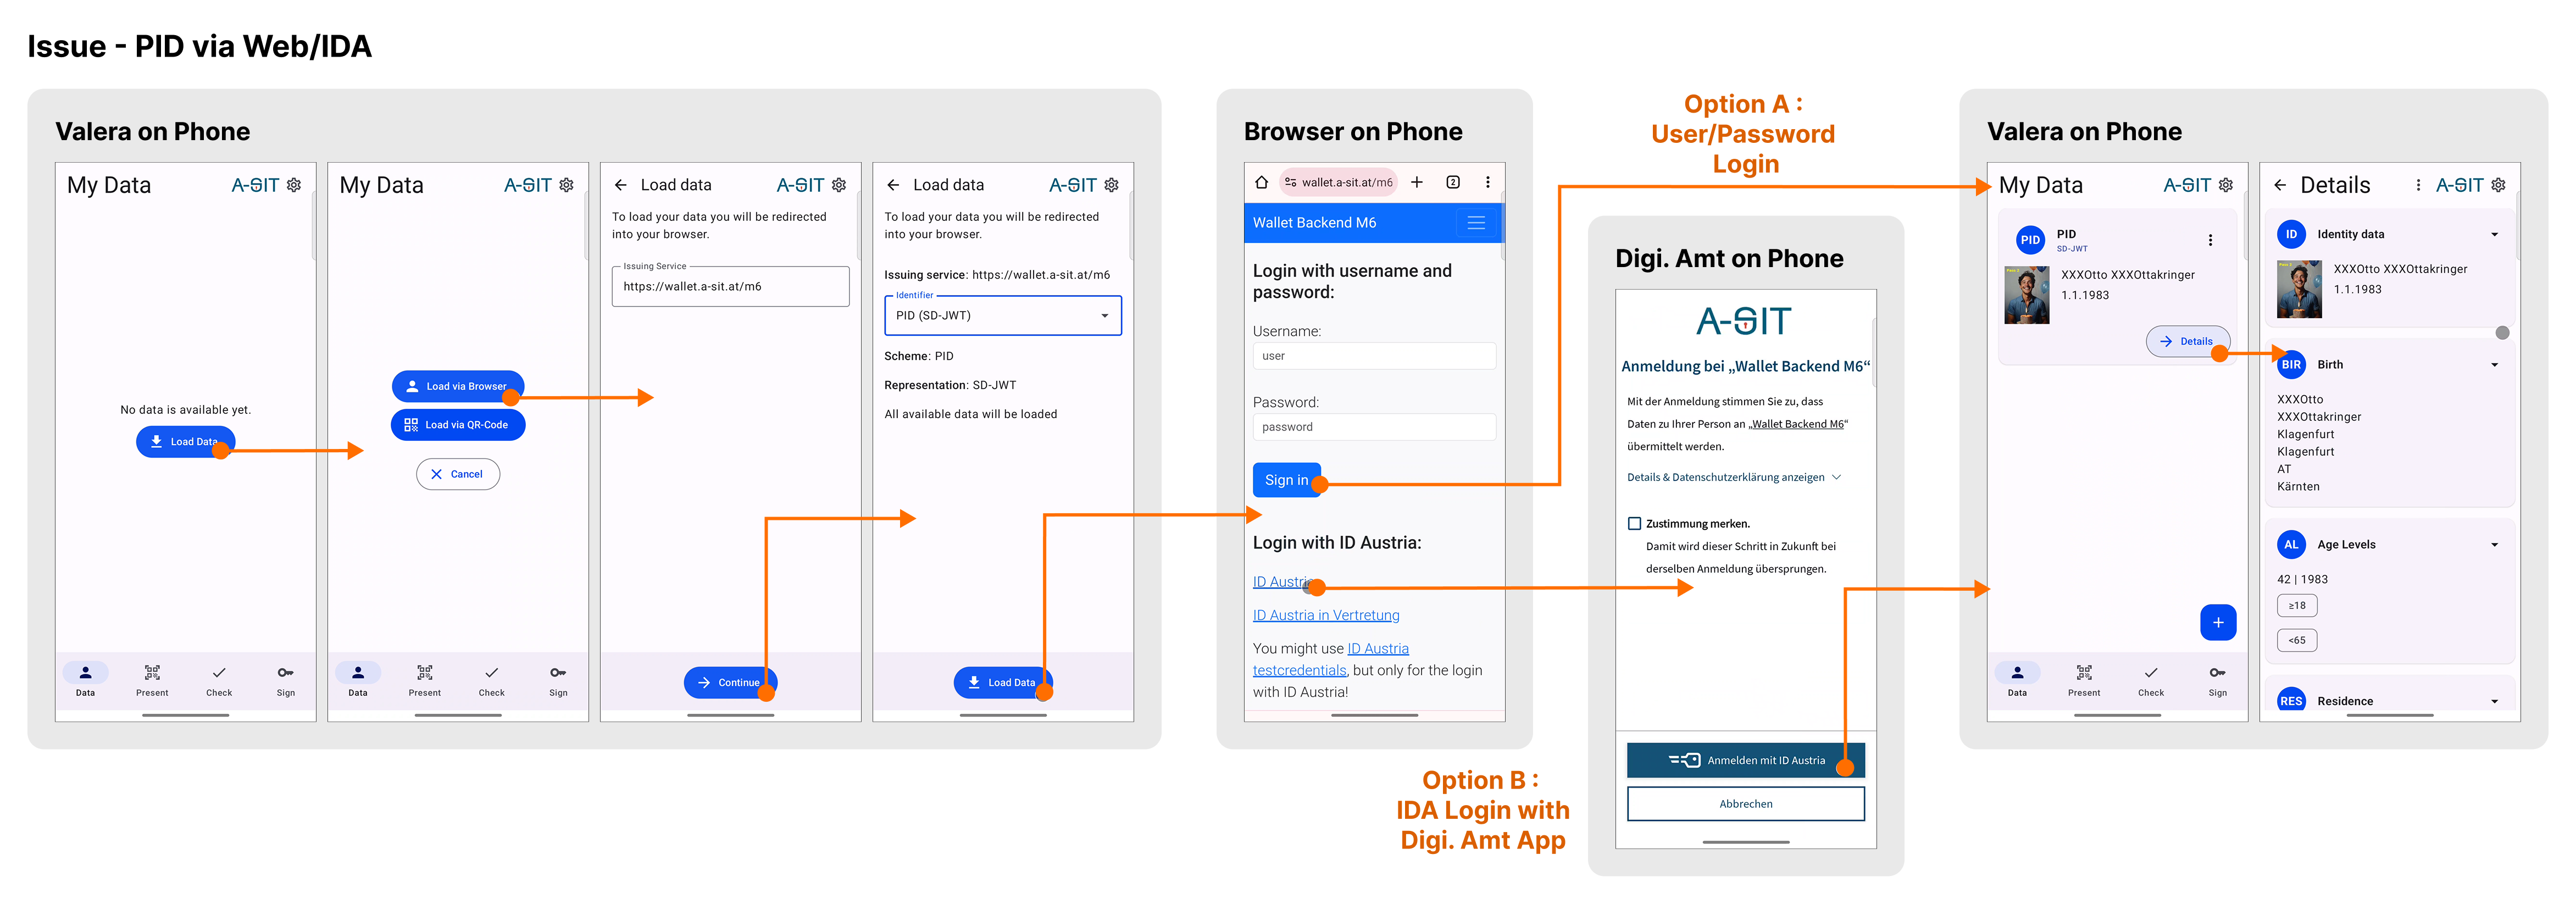
| » via Browser | steps | - | (implicitly in presentation) | |
| Present Credentials | ||||
| » remote | to eIDAS2 RP | steps | steps | steps |
| to IDA RP | steps | steps | steps | |
| » proximity | - | steps | - | |
| Sign Documents | ||||
| » Wallet-Centric | ad-hoc certificate | steps | steps | steps |
| pre-loaded certificate | steps | steps | - | |
| » RP-Centric | steps | steps | steps | |